
Welcome to the fifth instalment of your beautiful advent blanket, designed by Rosina Plane.
All the posts about the CAL and each instalment is now together in its own section of the website here.
You need to register with this website to view the pattern – but registration is free. When you log in, the pattern will appear below!
Day 5: Overlay mosaic & back post stitches
You might have noticed that you had a lot of yarn left over from yesterday’s section. Well, you’ll be using that together with today’s colour for the first half of today’s section! Just like the Inset Mosaic we learned earlier in the week, this technique is super simple but it gives amazingly effective results. The pretty colourwork section is created using a simple four-stitch repeat that you will get the hang of really quickly once you’ve nailed one new stitch.
The stitch we need to learn for overlay mosaic is FLtr2d – that might sound complicated but it’s just a combination of things you can definitely already do! That’s the magic thing about crochet – once you’ve learned the basics, everything else is just a variation of doing those things in different combinations. Let’s break it down:
Special Abbreviation
FLtr2d (front loop treble 2 down) – working in front of sts from previous row, treble in FLO of st 2 rows below.
FL = front loop – well, you did this yesterday, you can definitely do this!
tr = treble crochet, one of the basics you’ve already got down.
2d = two rows down. This is the new bit – you just need to learn how to find the front loop which is 2 rows down from the row you’re currently working on. If you can’t visualise that, don’t worry – scroll down for some handy overlay mosaic tutorials!
Very important note!
Overlay mosaic crochet is worked with the RS facing you at all times, so you will need to cut the yarn at the end of rows 1–6. DO NOT TURN your work before you start this section and don’t turn at the end of rows 1–6.
Standing stitches are made as usual sts beginning with the slip knot on hook.
Start crocheting…
Row 1 (RS): With RS facing, join Go Grape with a standing dc in first st (this is the opposite end to where you fastened off yesterday – it will be the top of the beg 3 ch from the last row of Day 4), dc in BLO across to last st, 1 dc. Fasten off. Do not turn. 117 sts
Row 2 (RS): Join Bubblegum with a standing dc in first st, 2 dc in BLO, *1 FLtr2d, 3 dc in BLO; rep from * to last 2 sts, 1 FLtr2d, 1 dc. Fasten off.
Row 3 (RS): Join Go Grape with a standing dc in first st, 1 dc in BLO, *1 FLtr2d, 3 dc in BLO; rep from * to last 3 sts, 1 FLtr2d, 1 dc in BLO, 1 dc. Fasten off.
Row 4 (RS): Join Bubblegum with a standing dc in first st, *1 FLtr2d, 3 dc in BLO; rep from * to last 4 sts, 1 FLtr2d, 2 dc in BLO, 1 dc. Fasten off.
Row 5 (RS): Join Go Grape with a standing dc in first st, 3 dc in BLO, *1 FLtr2d, 3 dc in BLO; rep from * to last st, 1 dc. Fasten off.
Row 6 (RS): As Row 2.
Row 7 (RS): As Row 3 but turn at end and do not fasten off.
Row 8 (WS): 1 ch, dc across. Turn.
And that’s it! You can do overlay mosaic now! Now, go get yourself a fresh cup of tea (or your beverage of choice) and let’s finish off today with a few simpler rows of back post stitches. The abbreviation for these stitches is RtrB or RdcB, which breaks down to:
R = raised, meaning the effect you get is that it makes the stitch “pop”
tr or dc = treble or double crochet
B = back, meaning that you work into the back post
Scroll down if you need a tutorial for working raised stitches into the back post – again, you’re just working a normal treble or double crochet stitch, but you’re putting your hook into a different place.
Row 9 (RS): 2 ch (does not count as a st), RtrB across to last st, 1 tr. Turn.
Row 10 (WS): 1 ch, dc to end. Turn.
Row 11 (RS): 1 ch, RdcB across to last st, 1 dc. Turn.
Row 12 (WS): 1 ch, dc across. Fasten off.
Need help with Overlay Mosaic?
You can find our designer Rosina’s guide to mosaic crochet here.
Rosina’s friend Tania has filmed a video tutorial to go alongside her guide, which you can view here.
VERY IMPORTANT NOTE: You should only refer to this video to learn the principle of how to work the FLtr2d – this starts at about 3:30 into the video. Tania is NOT working the stitch pattern used in this blanket. Also, Tania is using American crochet terms but she shows the stitch really clearly. Thanks so much Tania!
Need help with working stitches into the back post?
Here’s a fab raised treble crochet tutorial by the team at The Crochet Project.
You can also watch Janie Crow’s video tutorial:
I’m ready for my close-up…
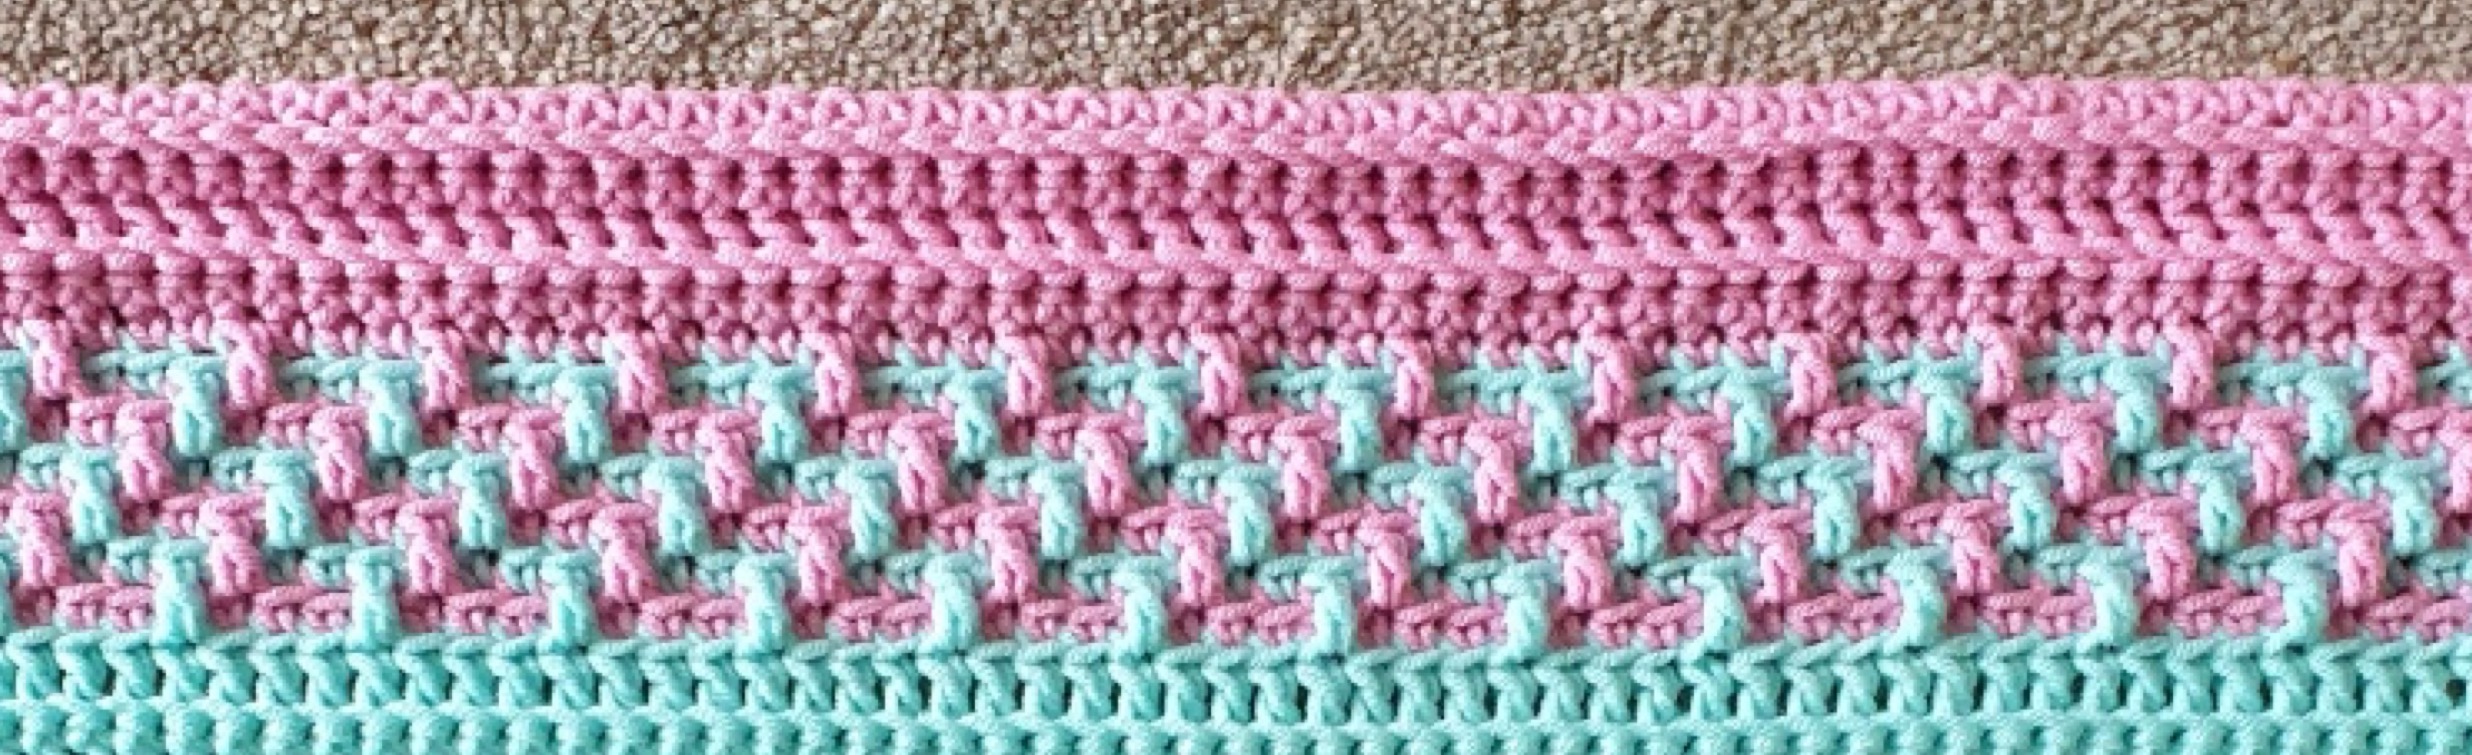
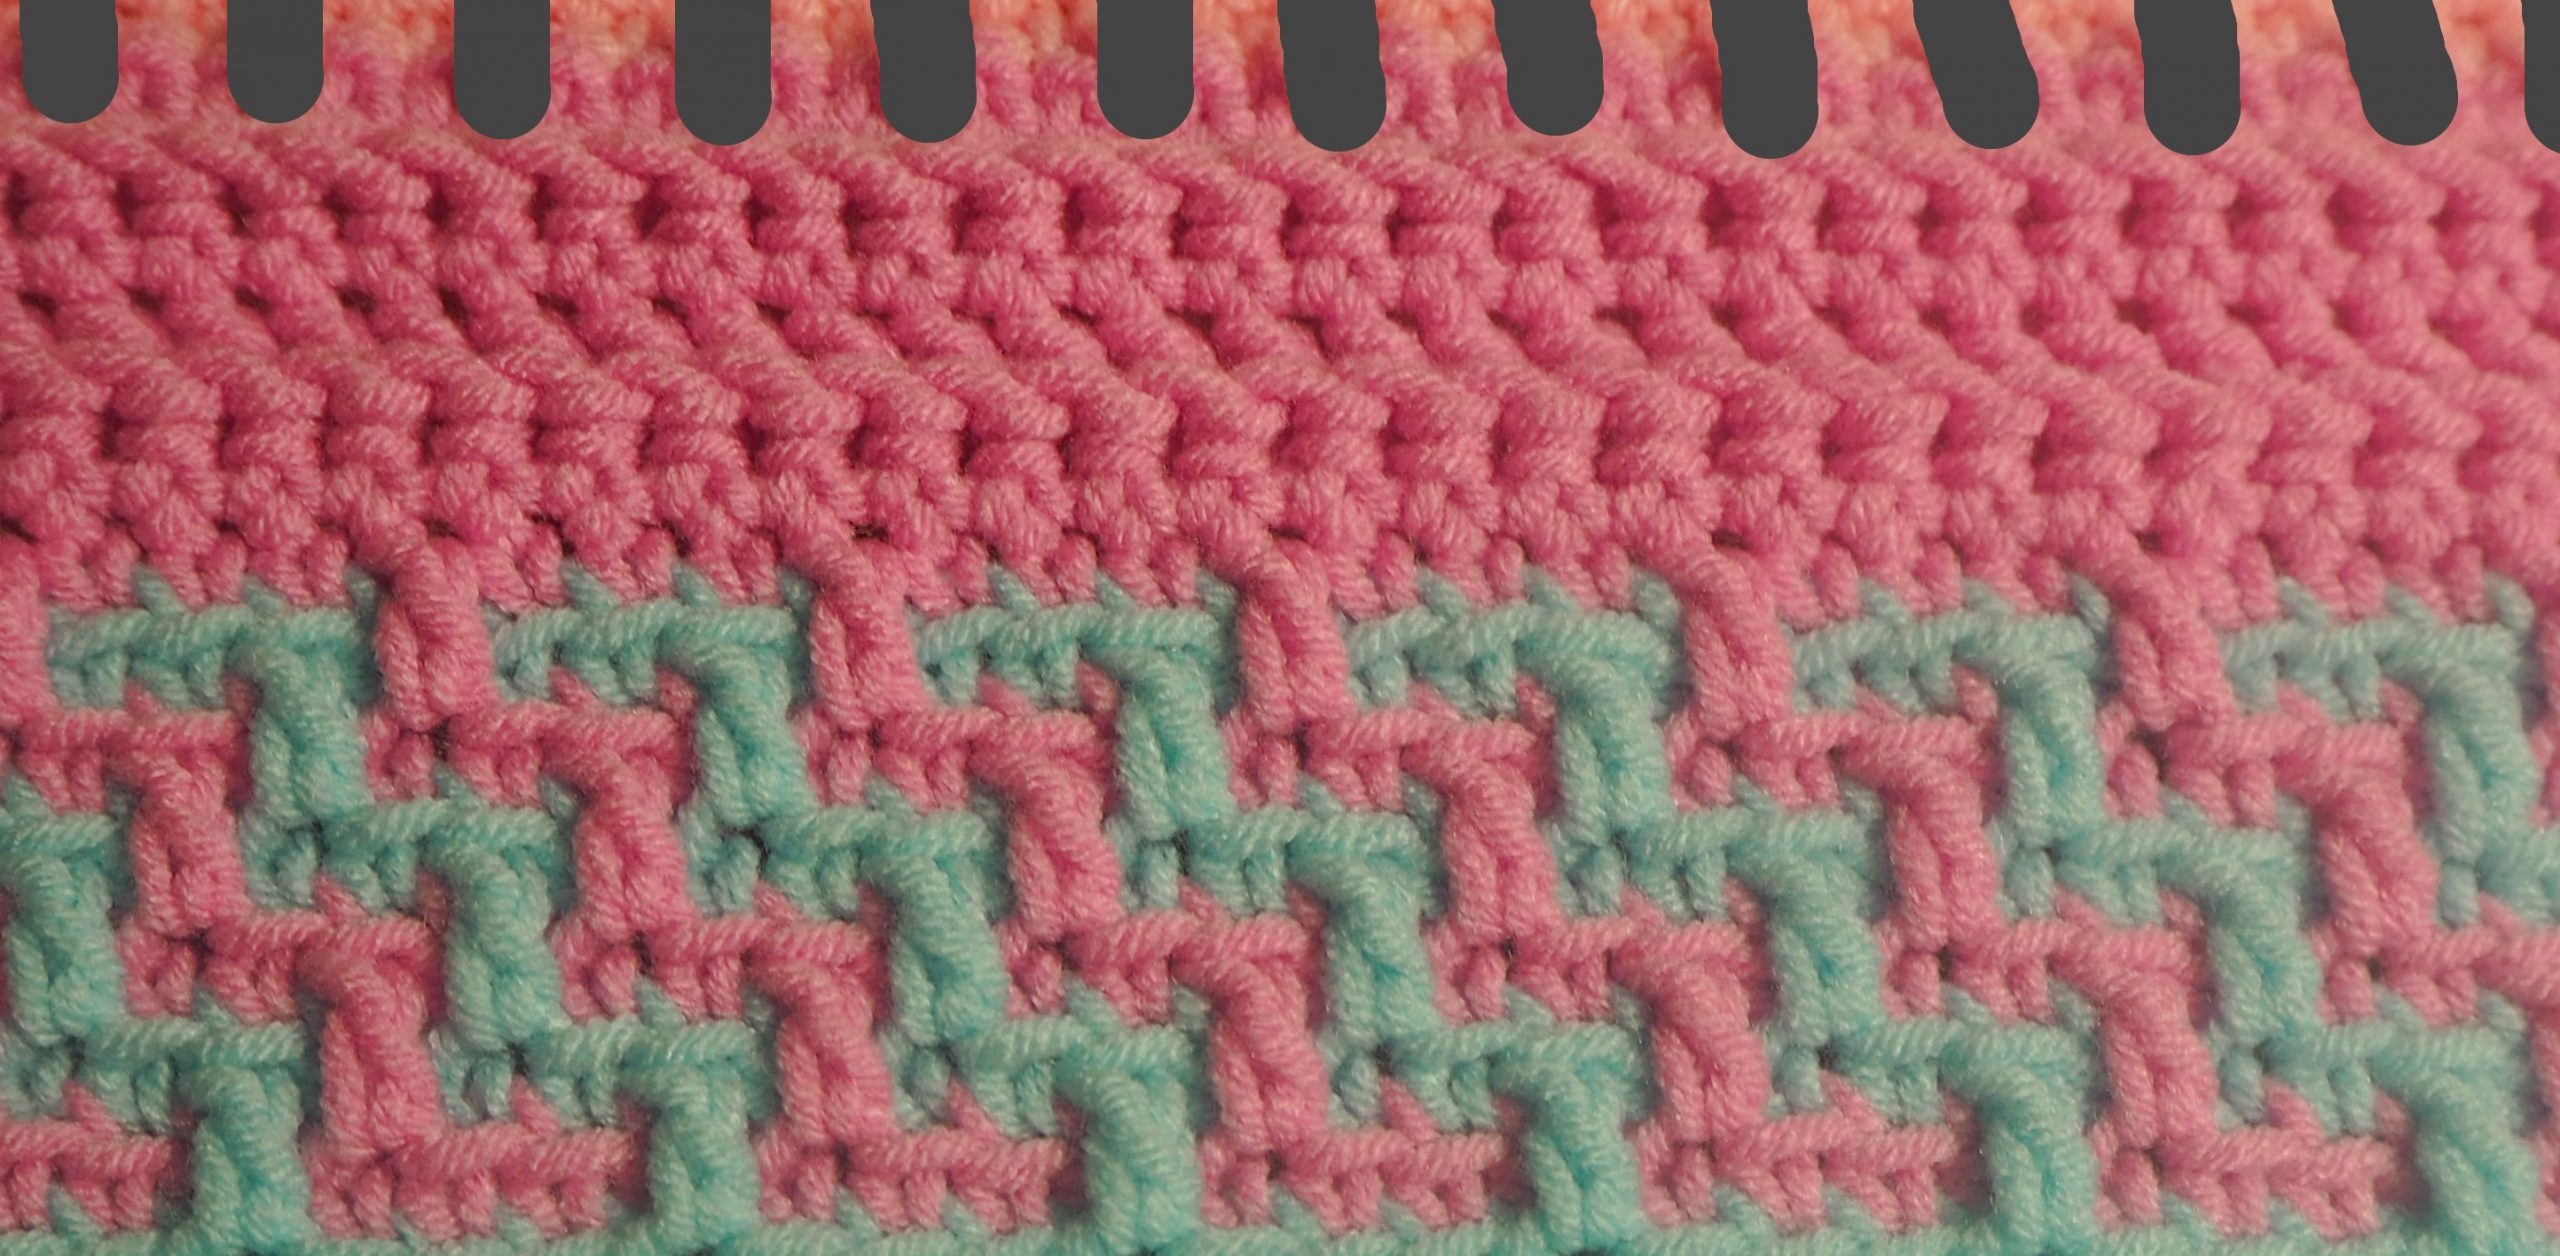
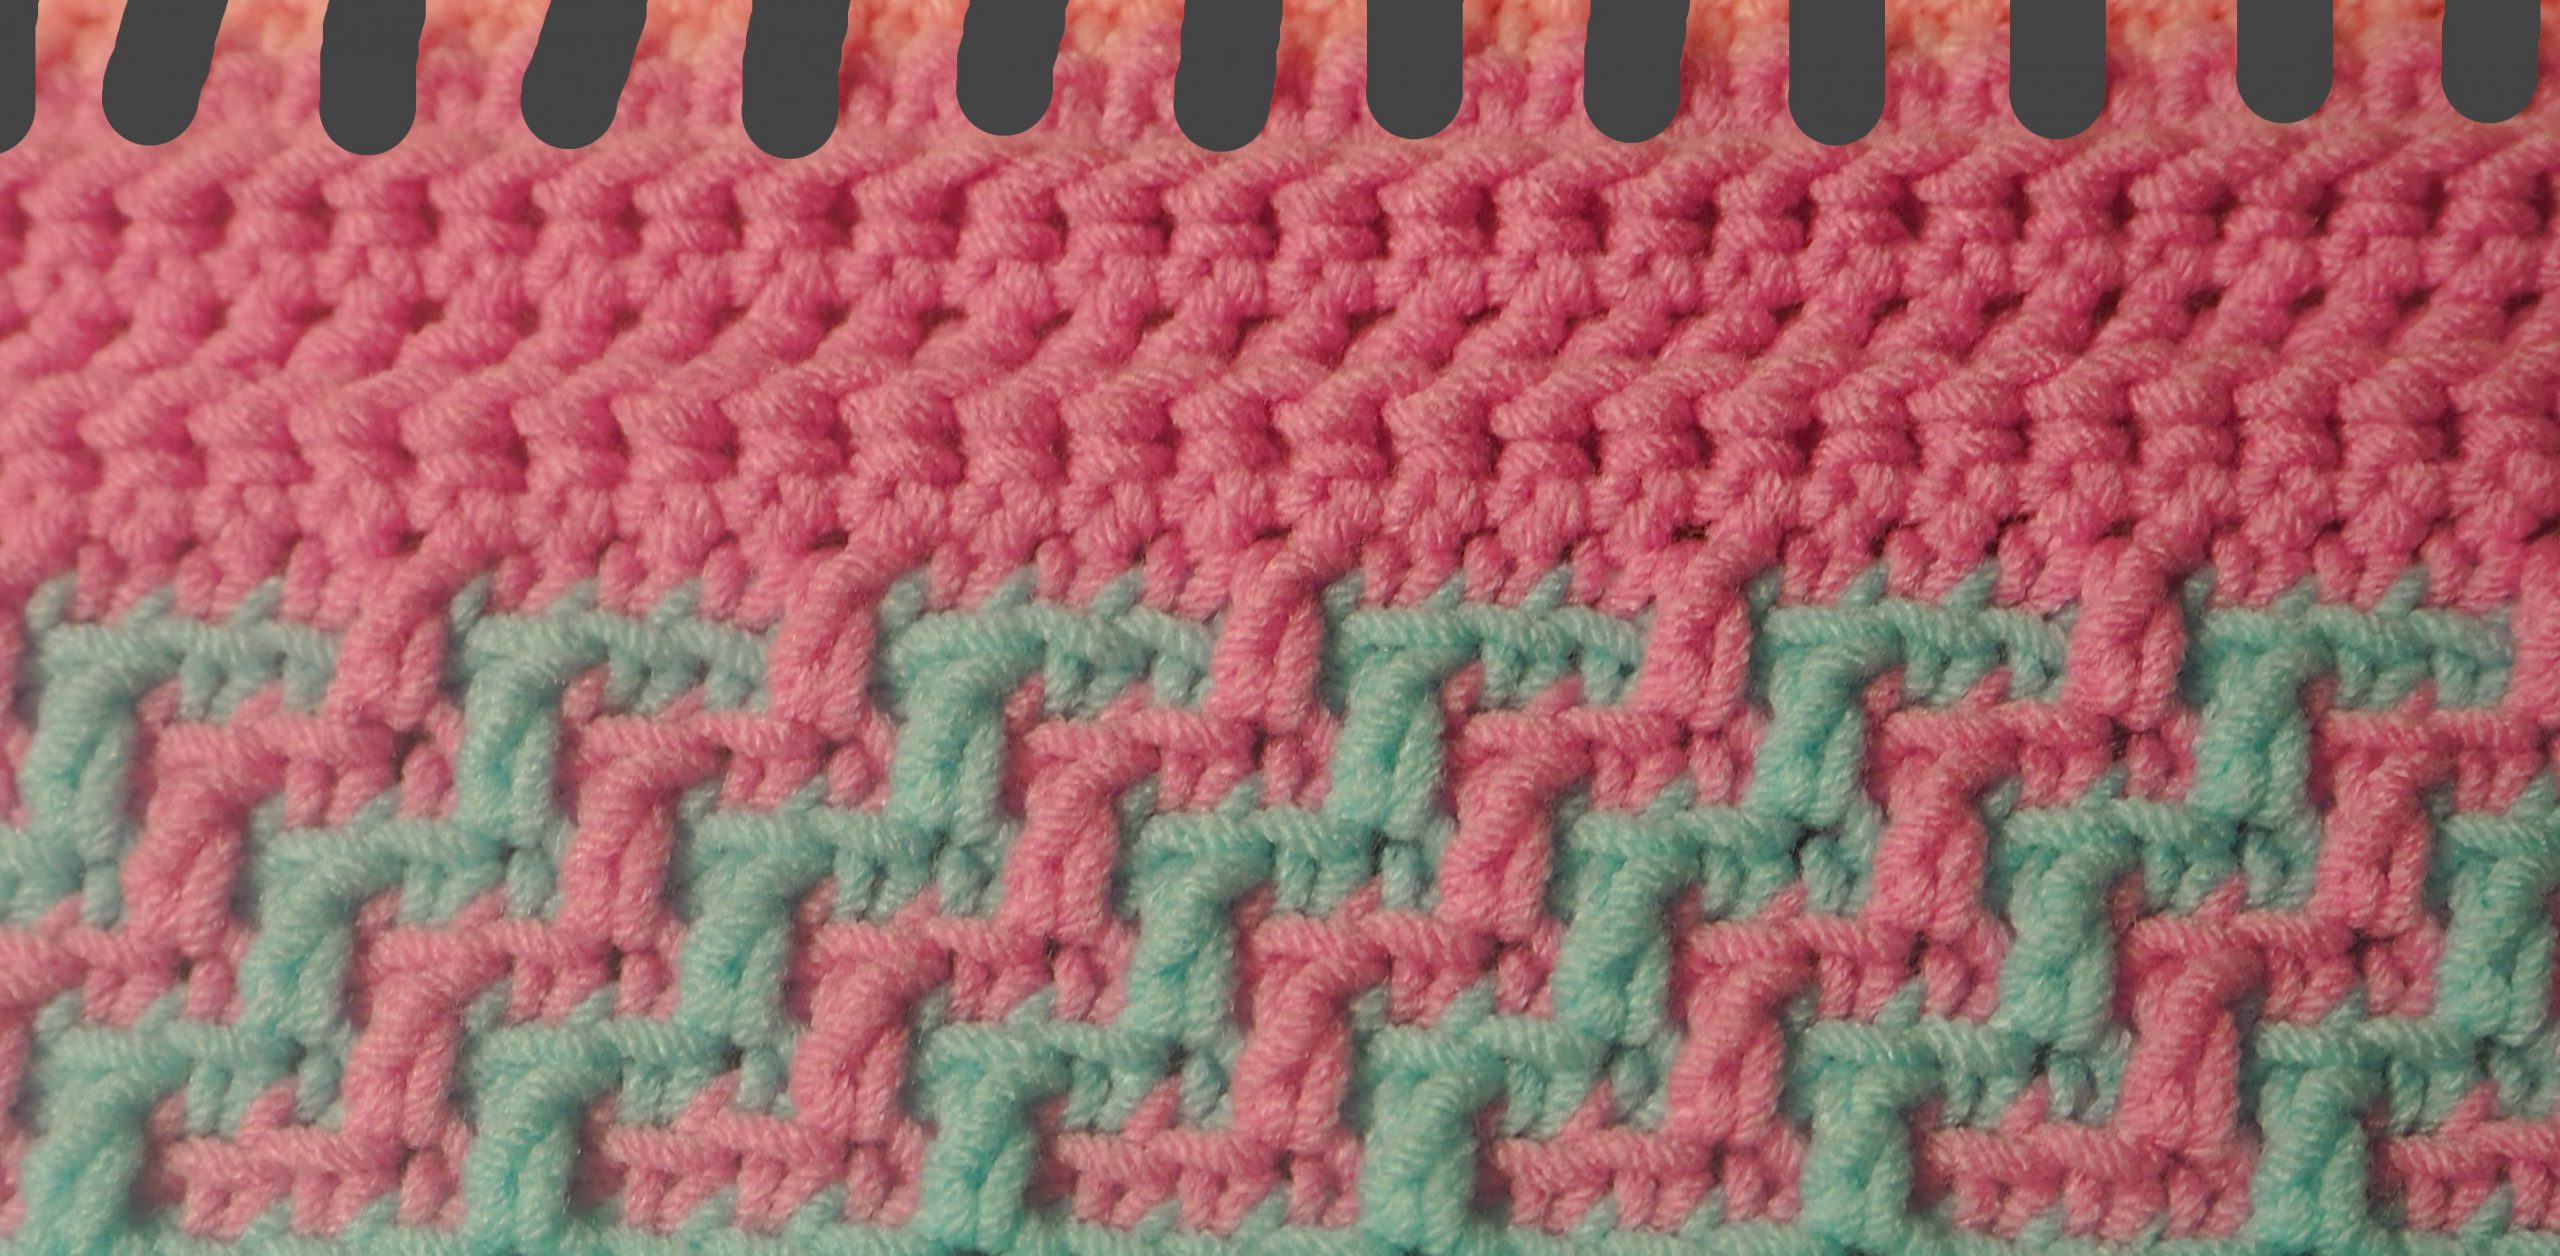
And finally, here are some closeups of this section. We’ve covered up tomorrow’s section with a little bit of grey to avoid spoilers! You can click on any of these images to see them bigger.
Right side
Right handed
Right side
Left handed

Wrong side
Right handed
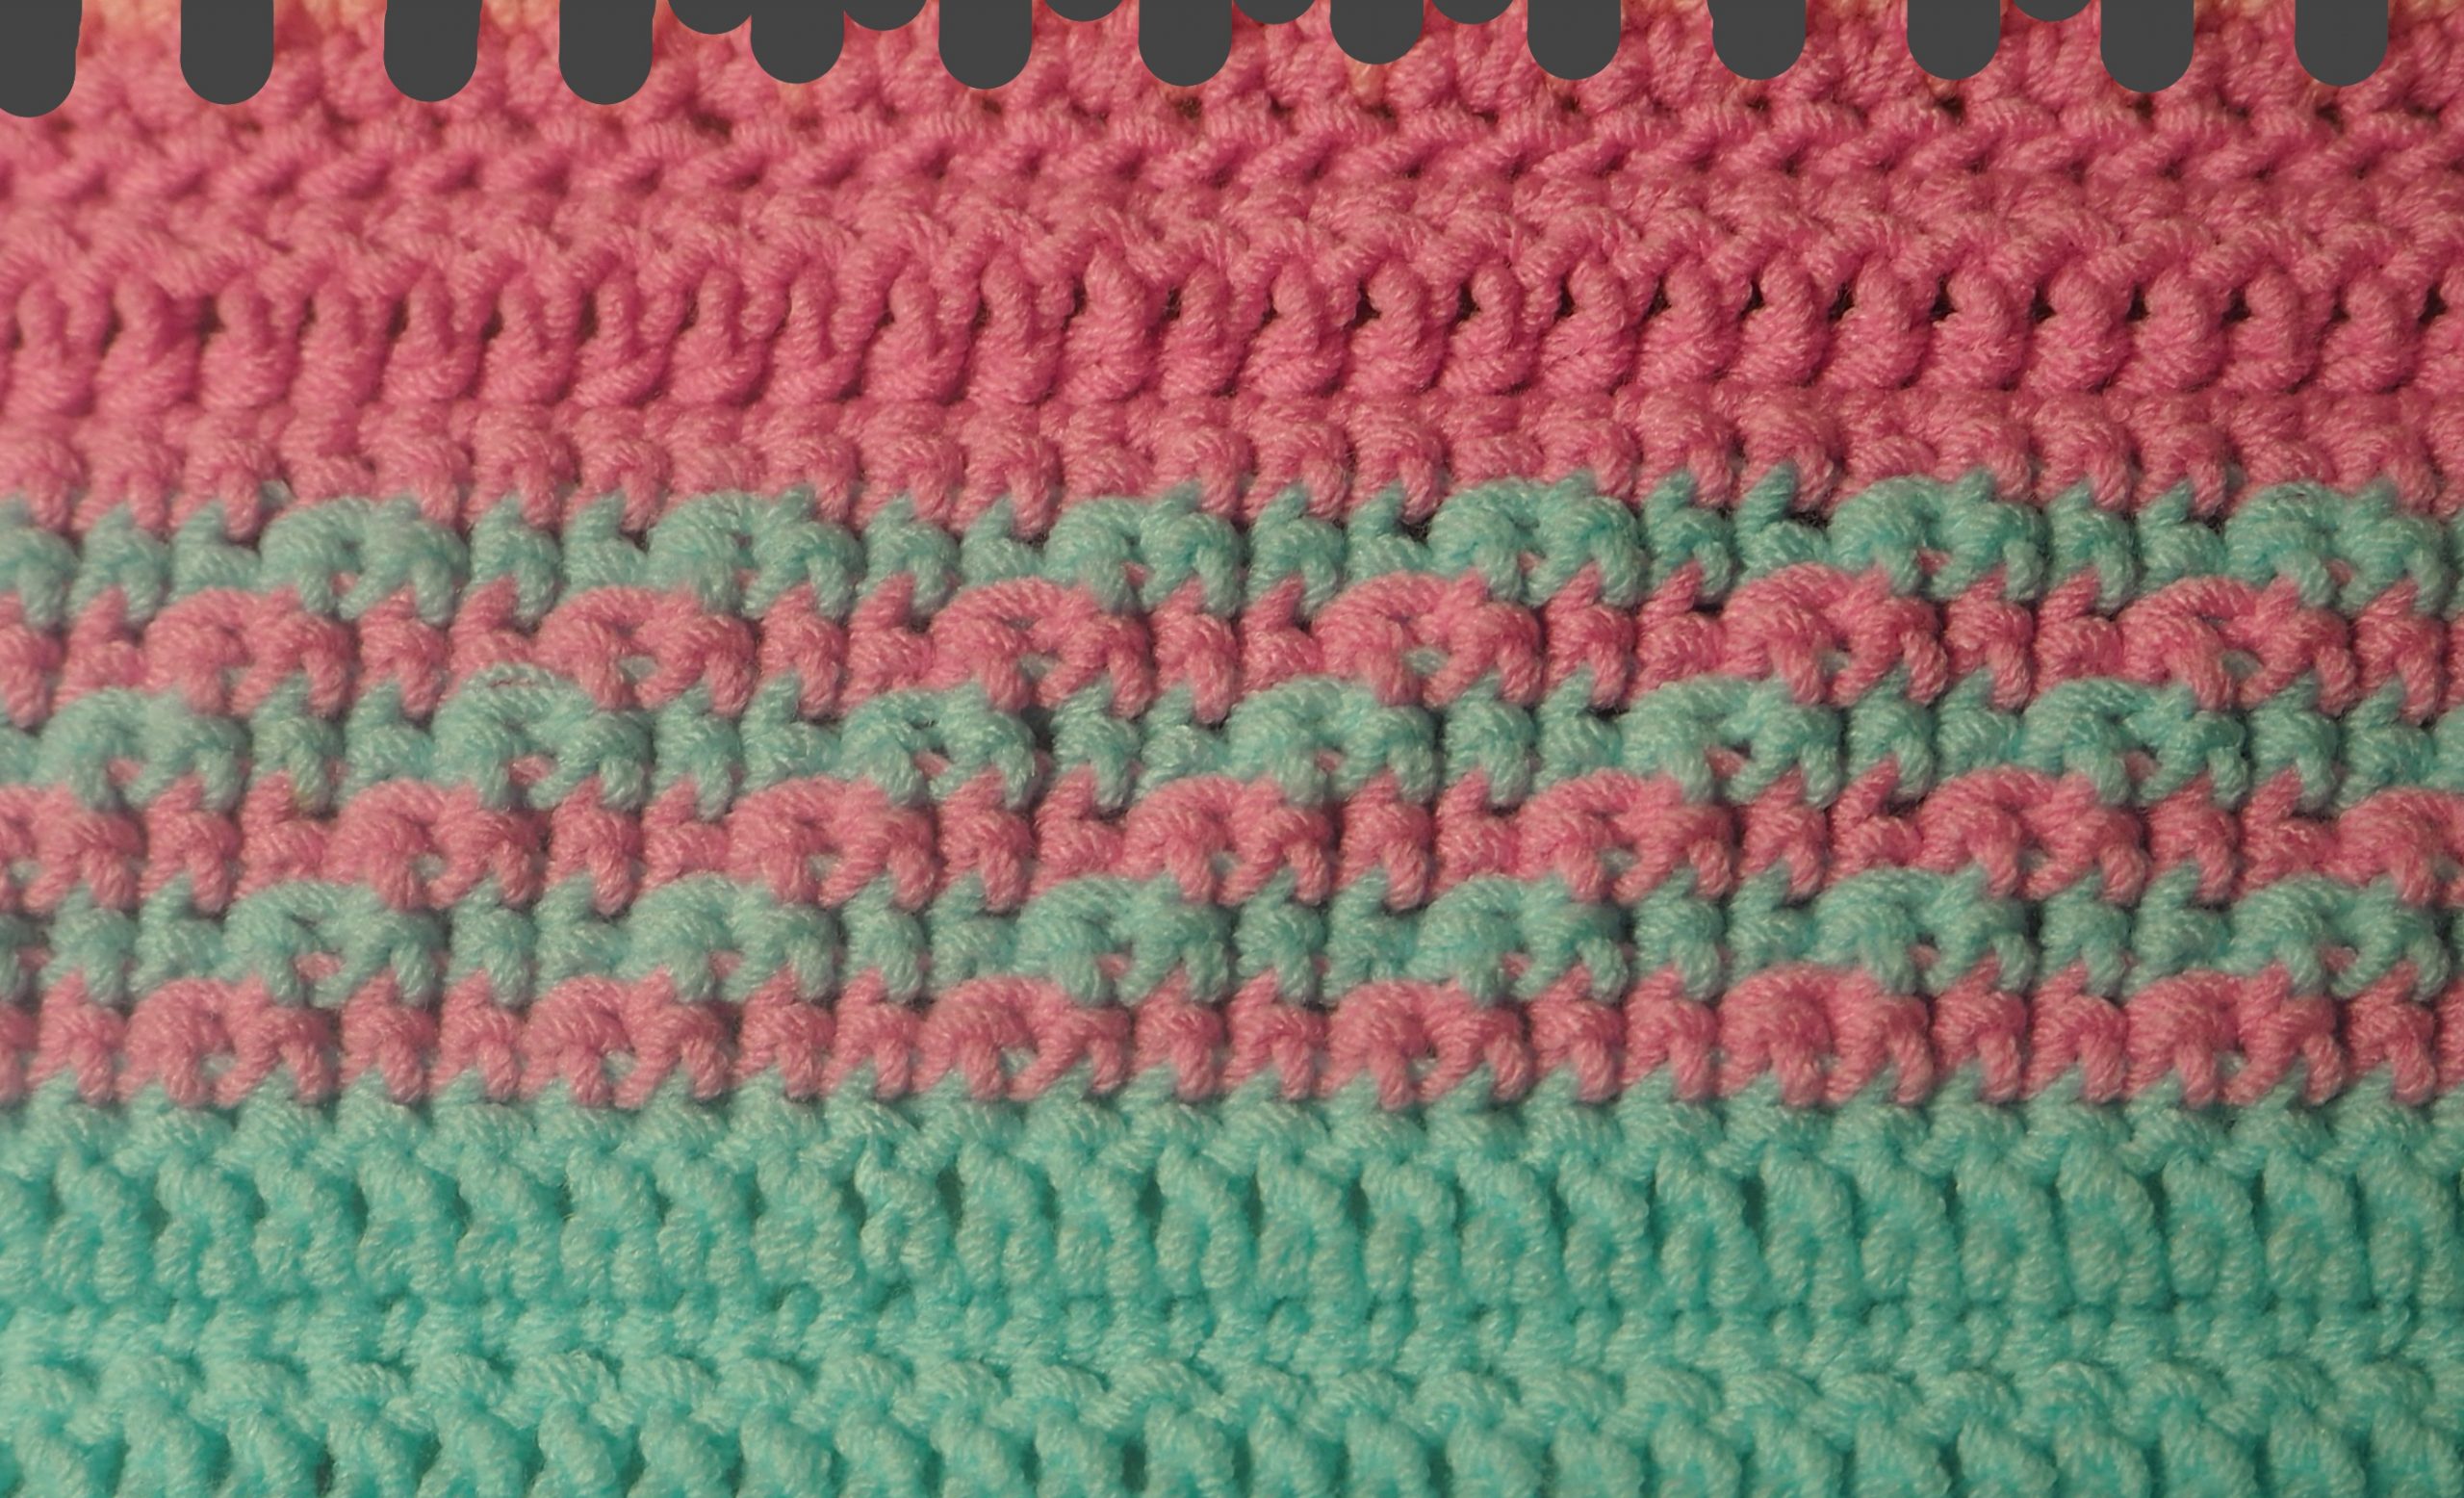
Wrong side
Right handed
TheCraftyFox
Just gets better and better. Thanks for pushing me.
JulieB2274
I’m trying to print from printfriendly and it tells me I need to be logged in to see the rest of the post. I am already logged in. Is there another way to print the daily parts?
Lorna Malkin
Hi Julie,
Sorry to hear you’re having trouble with the login. Please can you contact our customer service team who can look into this for you: crochetsociety@practicalpublishing.co.uk
I’m afraid we don’t have a printable version of the calendar instructions available, however you should be able to copy and paste the instructions into a word document and print from there. 🙂 x
Poppy1
Please could someone help me with part 3 I just can’t understand it
Gigi
On the fb goup someone has posted photos which break it down.
Juls
I have run out of the colour grapevine with 3 rows to go 🙁
Catycrochet
Hi I’m very late to the party due to Christmas gifts being made and a couple of last minute commissions. I’m a little confused by row 2 3dc in blo is that 3dc in next blo or 1 dc in next 3 blo?