Free UK postage
when you spend £40

Ta Da! We've had permission to share with you a fantastic pattern from Crochet Now Magazine issue one. This adorable little crochet rabbit was designed by Irene Strange, and was inspired by vintage and heirloom toys made modern by using gorgeous shades of soft baby yarn.
As with all toys, if you're making for kids under 3 years old, you need to be really careful about anything like eyes not being very securely attached. To be safe, you could embroider the eyes instead of adding little plastic ones.
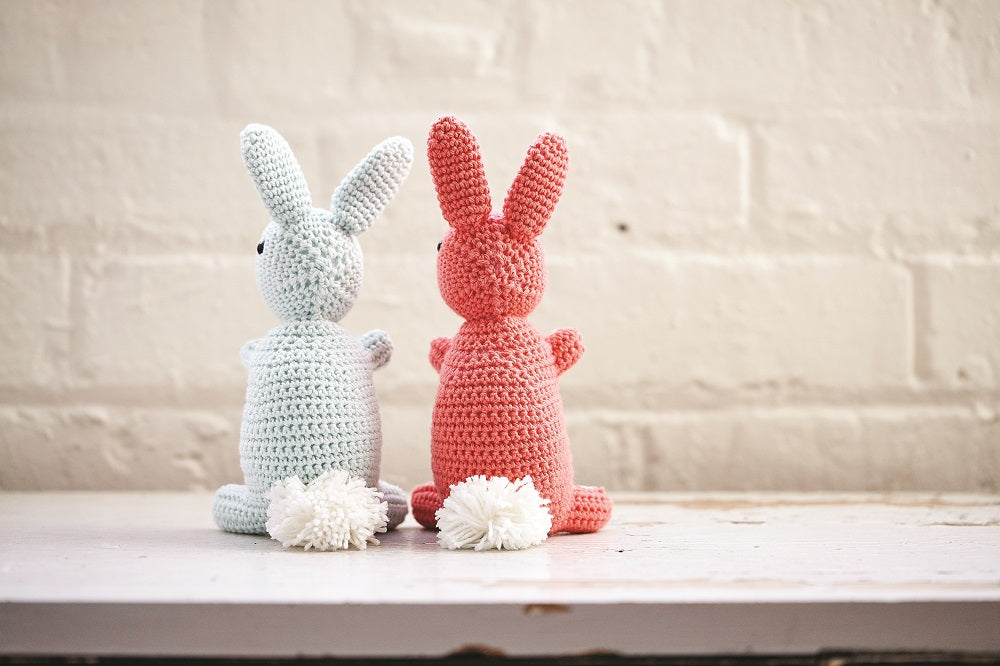
If you use a wool based yarn you can add a lovely fluffy texture to the tummy of your bunny by brushing with a wire brush (very gently!) after you have sewn it all together. You want your bunnies to be super snuggly. This would look so lovely on a shelf in the nursery - or could be repurposed for a little Easter gift. But bunnies aren't just for Easter.
Yarn used Rico Baby Soft Cotton DK, 1 ball each in Coral or Mint (MC) and White (CC)
About the yarn DK, 125m per 50g ball; 50% cotton, 50% acrylic
Tension 11 sts x 10 rows = 5cm measured over dc Amigurumi are tightly crocheted toys, keep stitches as close as possible
Hook used 3.5mm
Other supplies 2 7.5mm black safety eyes stitch marker
Sizing One size – 20cm tall Each toy uses roughly 30g of MC and 15g of CC
The head and ears of this project are worked in spirals, without joining each round and without a turning chain. Use a stitch marker to mark the beginning of each round, slipping it as you go. The body and tummy are worked flat in rows
Foundation Double Crochet (fdc) Step by step
Use this stitch to extend the flat pieces adding sections for arms and legs. To make, once you get to the end of the row that asks for the foundation dc do the following:
Carry on to desired number of stitches.
Start crocheting
Head
Rnd 1: Using MC, make a magic ring and sl st to secure. Work 6 dc in ring. Pm to indicate start of round. 6 sts
Rnd 2: 2 dc in each stitch around. 12 sts
Rnd 3: Dc around.
Rnd 4: [2 dc in first st, 1 dc] six times. 18 sts
Rnd 5: Dc around.
Rnd 6: [2 dc in first st, 2 dc] six times. 24 sts
Rnd 7: Dc around.
Rnd 8: [2 dc in first st, 3 dc] six times. 30 sts
Rnd 9: Dc around.
Rnd 10: [2 dc in first st, 4 dc] six times. 36 sts
Rnds 11-15: Dc around.
Rnd 16: [Dc2tog, 4 dc] six times. 30 sts
Rnd 17: [Dc2tog, 3 dc] six times. 24 sts
Rnd 18: [Dc2tog, 2 dc] six times. 18 sts. Add safety eyes between Rnds 10 and 11.
Rnd 19: [Dc2tog, 1 dc] six times. 12 sts. Stuff firmly.
Rnd 20: [Dc2tog] six times. 6 sts Fasten off, weave tail through remaining sts and pull tight to close.
Ears
Rnd 1: Using MC make a magic ring and sl st to secure. Work 6 dc in ring. Pm to indicate start of round. 6 sts
Rnd 2: [2 dc in first st, 2 dc] twice. 8 sts
Rnd 3: [2 dc in first st, 2 dc] twice. 10 sts
Rnd 4: [2 dc in first st, 2 dc] twice. 12 sts
Rnds 5-13: Dc around. Fasten off, set aside.
Body
Using MC, chain 31.
Row 1: Starting in 2nd ch from hook, dc across. Turn. 30 sts
Row 2: 1 ch (does not count as st here and throughout), 2 dc in first st, 28 dc, 2 dc in last st. Turn. 32 sts
Row 3: 1 ch, 14 dc, 2 dc in next st, 2 dc, 2 dc in next st, dc across. Turn. 34 sts
Row 4: 1 ch, 14 dc, 2 dc in next st, 4 dc, 2 dc in next st, dc across. Turn. 36 sts
Row 5: 1 ch, dc2tog, 12 dc, 2 dc in next st, 6 dc, 2 dc in next st, 12 dc, dc2tog. Turn. 36 sts
Row 6: Sl st in first 6 sts, 1 ch, 7 dc, 2 dc in next st, 8 dc, 2 dc in next st, 7 dc, miss remaining st. Turn. 26 sts Row 7: 1 ch, 7 dc, 2 dc in next st, 10 dc, 2 dc in next st, dc across. Turn. 28 sts
Row 8: 1 ch, 7 dc, 2 dc in next st, 12 dc, 2 dc in next st, dc across. Turn. 30 sts
Row 9-14: 1 ch, dc across. Turn. 30 sts
Row 15: 1 ch, 7 dc, dc2tog, 12 dc, dc2tog, dc across. Turn. 28 sts
Row 16: 1 ch, dc across. Turn. 28 sts
Row 17: 1 ch, 7 dc, dc2tog, 10 dc, dc2tog, dc across. Turn. 26 sts
Row 18: 1 ch, 1 dc across, 5 ch (counts as 5 sts). Turn. 31 sts
Row 19: 1 ch, 12 dc, dc2tog, 8 dc, dc2tog, 7 dc, 5 fdc. Turn. 34 sts.
Row 20: 1 ch, 12 dc, dc2tog, 6 dc, dc2tog, dc across. Turn. 32 sts
Row 21: 1 ch, 12 dc, dc2tog, 4 dc, dc2tog, dc across. Turn. 30 sts
Row 22: 1 ch, 12 dc, dc2tog, 2 dc, dc2tog, dc across. Turn. 28 sts
Row 23: Sl st in first 5 sts, 7 dc, 2 dc2tog, 7 dc, miss remaining st. Turn. 16 sts
Row 24: 1 ch, dc2tog, 12 dc, dc2tog. Turn. 14 sts
Row 25-26: 1 ch, dc across. Turn. Fasten off, leaving a long tail for sewing up.
Tummy - worked flat in rows
Using CC, chain 3.
Row 1: Starting in 2nd ch from hook, 2 dc in each stitch across. Turn. 4 sts
Row 2: 1 ch, 2 dc in first st, 2 dc, 2 dc in last st. Turn. 6 sts
Row 3: 1 ch, 2 dc in first st, 4 dc, 2 dc in last st. Turn. 8 sts
Row 4: 1 ch, 2 dc in first st, 6 dc, 2 dc in last st. Turn. 10 sts
Row 5: 1 ch, 2 dc in first st, 8 dc, 2 dc in last st. Turn. 12 sts
Row 6: 1 ch, dc across, 5 ch (counts as 5 sts). Turn. 17 sts
Row 7: 1 ch, dc across, 5 fdc. Turn. 22 sts
Row 8: 1 ch, 2 dc in first st, 20 dc, 2 dc in last st. Turn. 24 sts
Rows 9-10: 1 ch, dc across. Turn.
Row 11: 1 ch, dc2tog, 20 dc, dc2tog. Turn. 22 sts
Row 12: Sl st in first 5 sts,12 dc, miss rem st. Turn. 12 sts
Row 13: 1 ch, 1 dc in first 4 st, 2 dc in next st, 1 dc in next 2 st, 2 dc in next st, dc across. Turn. 14 sts
Row 14: 1 ch, dc across. Turn.
Row 15: 1 ch, 4 dc, 2 dc in next st, 4 dc, 2 dc in next st, dc across. Turn. 16 sts
Rows 16-17: 1 ch, dc across. Turn
Row 18: 1 ch, 4 dc, dc2tog, 4 dc, dc2tog, dc across. Turn. 14 sts
Row 19: 1 ch, 4 dc, dc2tog, 2 dc, dc2tog, dc across. Turn. 12 sts
Row 20: 1 ch, 4 dc, 2 dc2tog, dc across. Turn. 10 sts
Row 21: 1 ch, dc across. Turn.
Row 22: 1 ch, 4 dc, dc2tog, dc across. Turn. 9 sts
Row 23: 1 ch, dc across, 5 ch (counts as 5 st). Turn. 14 sts
Row 24: 1 ch, 14 dc, 5 fdc. Turn. 19 sts.
Row 25-27: 1 ch, dc across. Turn.
Row 28: Sl st in first 5 sts, 3 dc, dc2tog, 4 dc, miss rem st. Turn. 8 sts
Rows 29-30: 1 ch, dc across. Turn. Fasten off.
Making up: Step by step
First sew together the Body and the Tummy.


With RS facing, match up the edge of both pieces along one side and pin together the arms and the legs. Then, using MC, carefully go around the edge of both pieces, leaving a gap in the neck.

Turn the body inside out and add lots of stuffing.


Sew the head to the neck opening.

Next sew the ears to the top of the head. Embroider the nose and mouth with a large X or any style you prefer. Finally use leftover CC to make a large fluffy pompom tail and sew it to the base of the body. Tidy up any loose ends to complete your Bunny.
The pattern was designed by Irene Strange - find more of her patterns over on her gorgeous website www.irenestrange.co.uk (it's a real treat for all crochet lovers!)