Free UK postage
when you spend £40

Welcome to the third instalment of your beautiful advent blanket, designed by Rosina Plane.

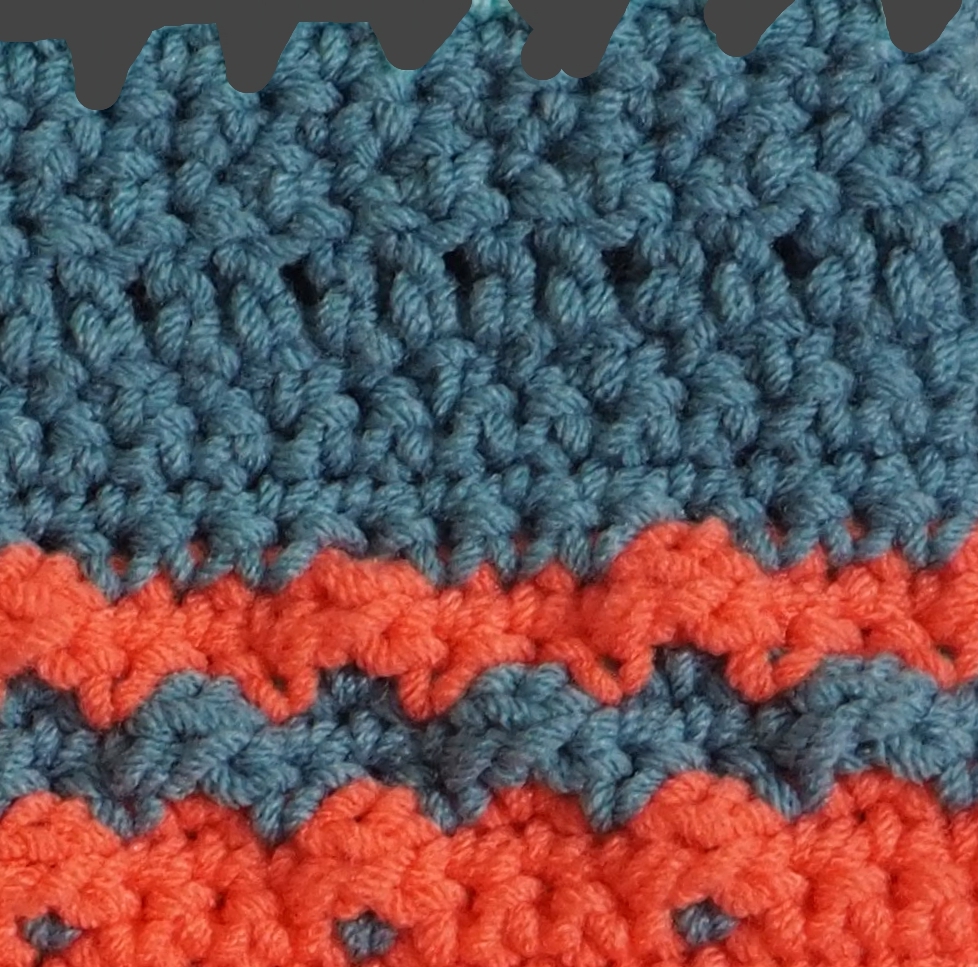
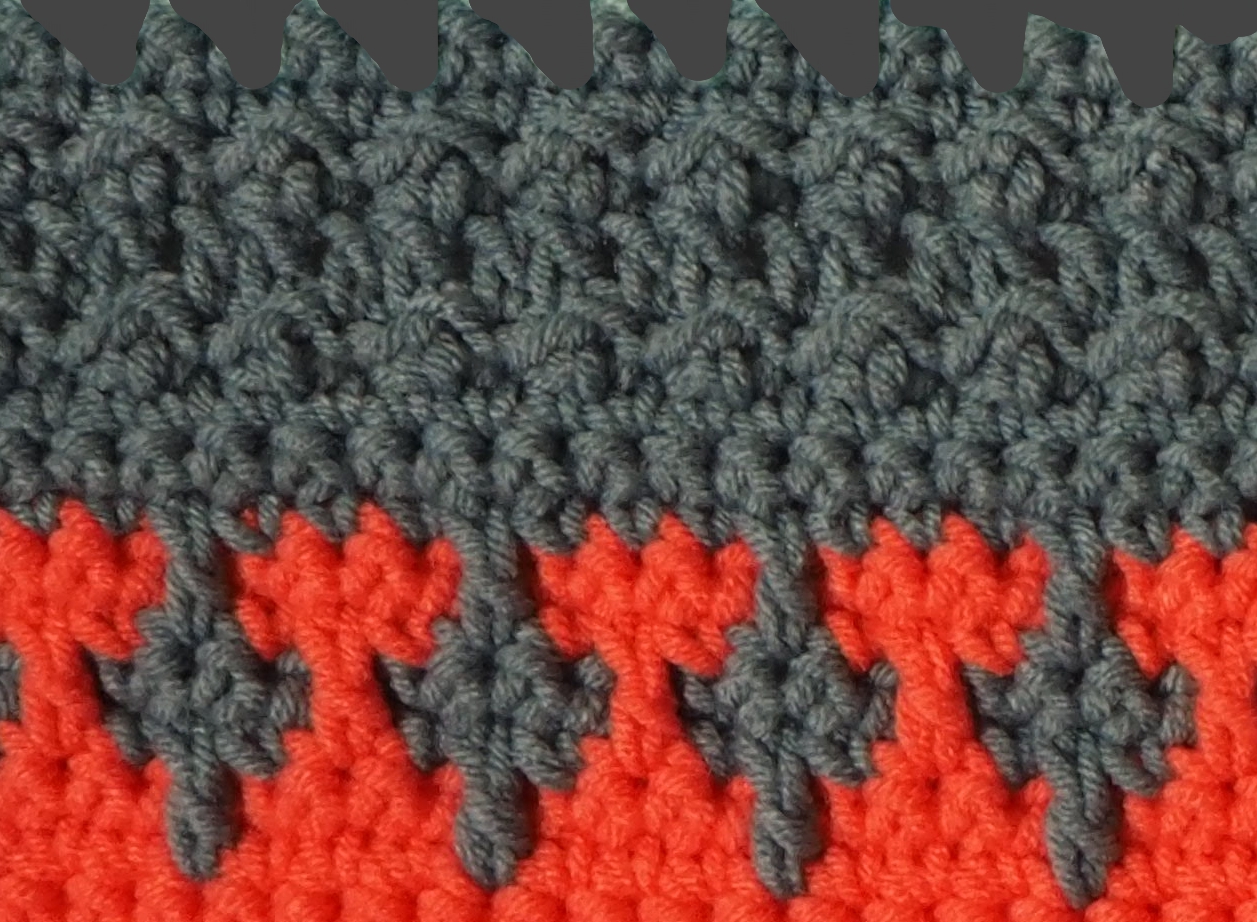
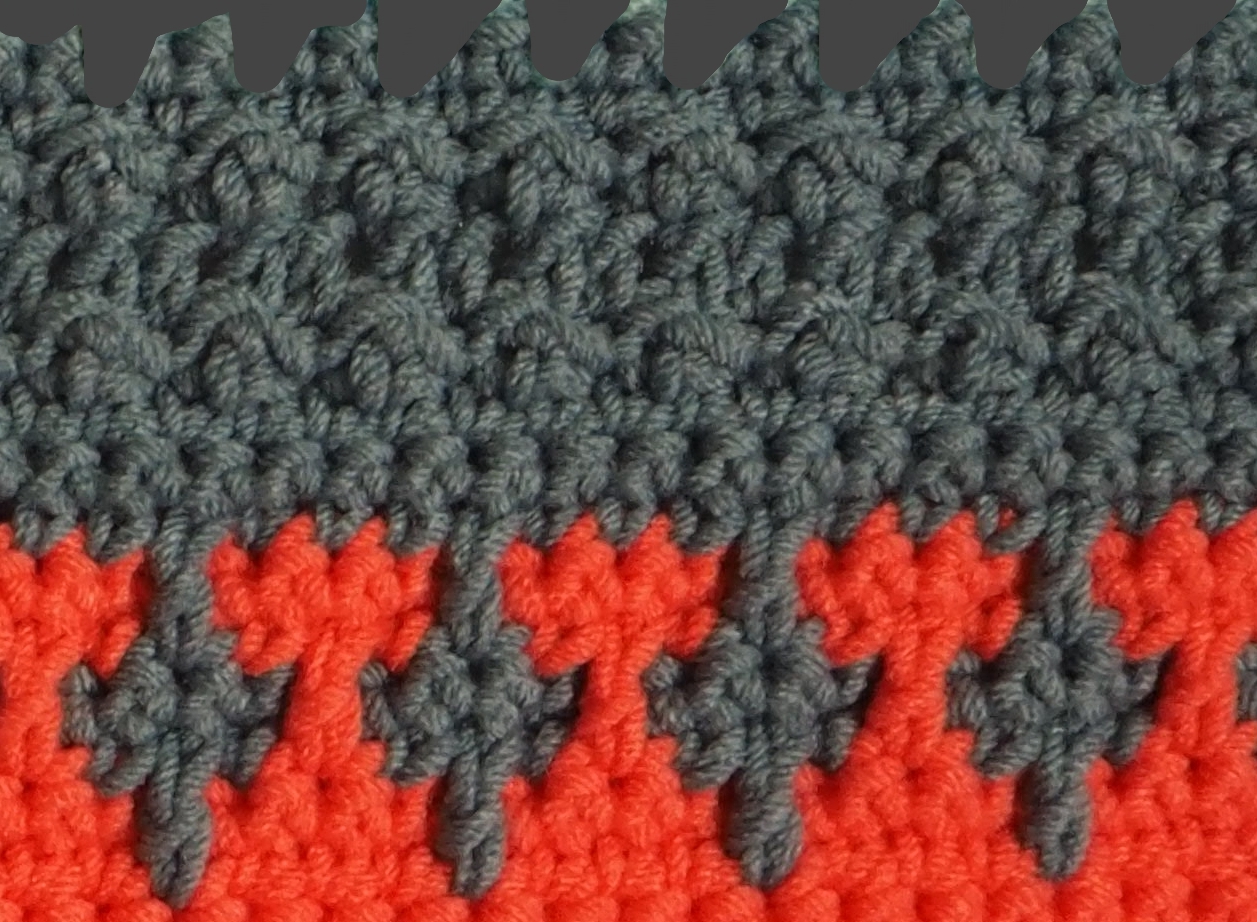
Scroll to the bottom of this post for more close-up photos
We've got a two-for-one for you today! The first half of today's section features the inset mosaic technique. It is completely magic - you can do complex-looking colourwork but you're just working one colour at a time and it's loads easier than it looks. There's only one new stitch to learn that unlocks this whole technique, which is: Tr3d (treble 3 down) – working in front of ch-sps from previous 2 rows, treble in missed st 3 rows below. If you can't quite visualise how that works, check out Rosina's fab photo tutorials for inset mosaic here.
Start crocheting...
Row 1 (RS): Remove marker and pull up a loop in Elderberry to join, 1 ch, 2 dc, *2 ch, miss 1 st, 1 dc, 1 tr3d, 1 dc; rep from * to last 3 sts, 2 ch, miss 1 st, 2 dc. Turn. 88 sts TIP: Your work is still the same width here even though your stitch count has reduced, as you've added in some chain spaces. Don't worry - your stitch count will right itself in a few rows' time.
Row 2 (WS): 1 ch, 2 dc, *2 ch, miss 2ch-sp, 3 dc; rep from * to last 2ch-sp, 2 ch, miss 2ch-sp, 2 dc. Turn.
Row 3 (RS): Drop Elderberry but do not cut it, pull up a loop in Just Peachy, 1 ch, 2 dc, 1 tr3d, 1 dc, *2 ch, miss 1 st, 1 dc, 1 tr3d, 1 dc; rep from * to last st, 1 dc. Turn. 89 sts
Row 4: 1 ch, 4 dc, *2 ch, miss 2ch-sp, 3 dc; rep from * to last st, 1 dc. Turn. Fasten off Just Peachy.
Row 5: Pull up a loop in Elderberry, 1 ch, 4 dc, *1 tr3d, 3 dc; rep from * to last st, 1 dc. Turn. 117 sts
That's the inset mosaic section finished! Now on to Floret stitch...
Rows 6–7: 1 ch, dc across. Turn.
Row 8 (WS): 1 ch, sl st in first st, 1 tr, *sl st in next st, 1 tr; rep from * to last st, 1 dc. Turn.
Row 9 (RS): 3 ch (counts as 1 tr), tr across. Turn.
Row 10: As Row 8.
Rows 11–12: 1 ch, dc across. Fasten off. Turn.
Check out the BellaCoco tutorial for the pretty Floret Stitch!
Here are some more close up shots of the finished blanket. Ignore the little grey scribbles - we've blocked out the next day's part so that you're not getting any spoilers! You can click on any of these images to see them a little bigger. For right-handed crocheters - here's how your work should look from the right side:
And here's how your wrong side will look:

For Left-Handed crocheters, here's how your work will look from the right side:
And here's how it'll look from the wrong side: